How To Set Up A Secure Matrix Registration Portal in Docker
I’ve been using my own self hosted stack for chatting and communication with the Matrix protocol for some time now. It is really cool and well featured for a self hosted application. However, I will say that the various components (of which there are many) can be a bit complicated to set up. There is an ansible playbook that seems pretty popular and people swear by it, but my services run in individually defined docker containers since I’m not familiar with ansible (perhaps to my own detriment). One of the paper cuts I find when running the sysnapse/element applications for family and friends is that there is no built in way to invite someone to become a user on your server. I left my server open to registration for a few days thinking that it wouldn’t matter and it wouldn’t be used by anyone, but I was seriously wrong on that. A few spammers signed up so I was able to easily delete their accounts using synapse-admin and lock back down the registration. So the below guide explains how to set up a new docker container that will provide a web gui for your users to sign up to your self hosted matrix/synapse server. Account creation will only be allowed if the user has a special access code. We will be using this github project.
Step 0: Create an app data folder for configs. My path below is used in the following example commands so you’ll want to make sure you edit the volume arguments to be consistent with your config folder location.
mkdir /sharedfolders/AppData/matrix-registration
Step 1: Create a config.yaml file in your app data folder copied from this file
Edit the following lines in config.yaml
- server_location: use your actual matrix homeserver URL
- server_name: ‘matrix.example.com’
- registration_shared_secret: find this value in your homeserver.yaml file used by the synapse server
- admin_api_shared_secret: this is not required, but it will allow for revoking and editing of the registration tokens given to users. You will need to be an Admin on the server. To find it, use the Element app and Settings > Help & About > Access Token
- client_redirect: the url for the login page of whichever chat web client you want your users to land on after registering. This could be your own self hosted element application, the public app.element.io, fluffychat, etc.
- db: ‘sqlite:////data/db.sqlite3’
- host: ‘0.0.0.0’
- filename: /data/m_reg.log
Step 2: Now that the config file is set up, pull the docker image
docker pull zeratax/matrix-registration:v0.9.2.dev2
Step 3: Tag the image for easier subsequent commands
docker tag zeratax/matrix-registration:v0.9.2.dev2 matrix-registration:latest
Step 4: Run the registration server container
docker run -d -p 5000:5000/tcp -v /sharedfolders/AppData/matrix-registration:/data --user "$(id -u):$(id -g)" --name matrix-registration matrix-registration serve
At this point, you will be able to view the registration web page by visiting http://<serverip>:5000/register
Step 5: In order to register an account, a token is needed. This will be generated in the command line and there are a few options available. Run with the -h flag to see the options.
docker run --rm -v /sharedfolders/AppData/matrix-registration:/data --user "$(id -u):$(id -g)" matrix-registration generate -h
The main options allow for controlling the number of uses for the token and the token’s expiration date. If you don’t want to generate a token for each of your friends, just leave the flags off and it will create a token with unlimited uses and no expiration.
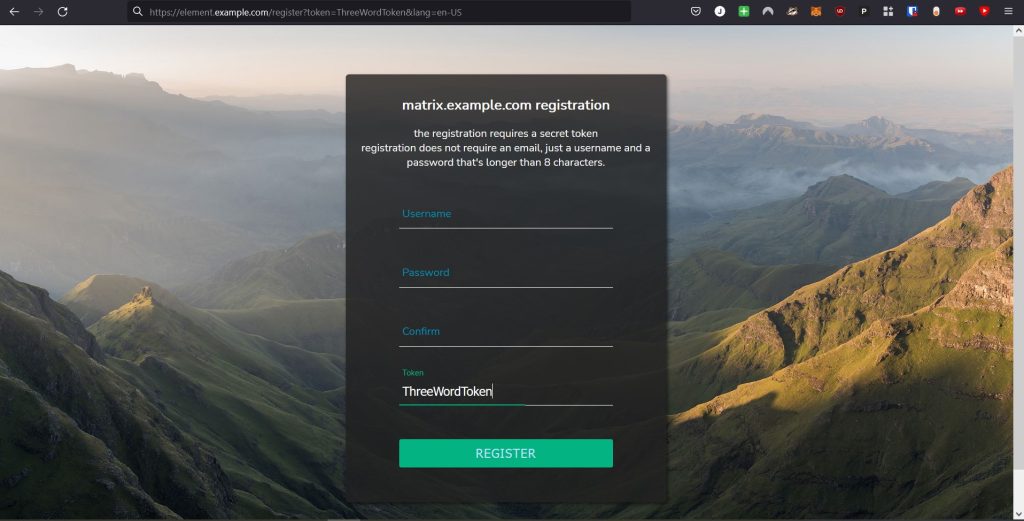
Take note of the token that is printed to the screen after running the generate command. On your registration web ui, enter it in the token section and fill out some user credentials to test it out.
Step 6 (optional): in order to view and revoke tokens, use the admin API shared secret from your config.yaml with the curl requests shown in this documentation.
Step 7: Configure the reverse proxy to access this site without using IP:port. I use NGINX and I decided to add this registration page as part of my Element web app subdomain. In the reverse proxy server block config for Element, I added this section which makes the page accessible at https://element.example.com/register
    location ~ ^/(static|register) {
    proxy_set_header X-Forwarded-For $remote_addr;
    proxy_pass http://<ipaddress>:5000;
    }
Step 8: We are finally ready to invite users. You have two options. Either just send them the URL to reach the page and tell them the three word token they will need to enter, or create the URL that already includes the token like so
https://element.example.com/register?token=ThreeWordToken&lang=en-US